
Assembling the Cambom Cheese Grater is a straightforward process that enhances your kitchen efficiency. This manual rotary grater, known for its versatility and user-friendly design, allows you to grate cheese, slice vegetables, and even grind nuts with ease. Proper assembly ensures optimal performance and longevity of the device.
In this guide, we’ll walk you through the assembly steps, discuss the importance of correct setup, and provide tips for effective use.
The Importance of Proper Assembly
Ensuring that your Cambom Rotary Cheese Grater is correctly assembled is crucial for several reasons:
- Safety: Proper assembly minimizes the risk of accidents during use.
- Efficiency: A correctly assembled grater operates smoothly, making food preparation quicker and more enjoyable.
- Durability: Following the correct assembly process helps maintain the grater’s condition, extending its lifespan.
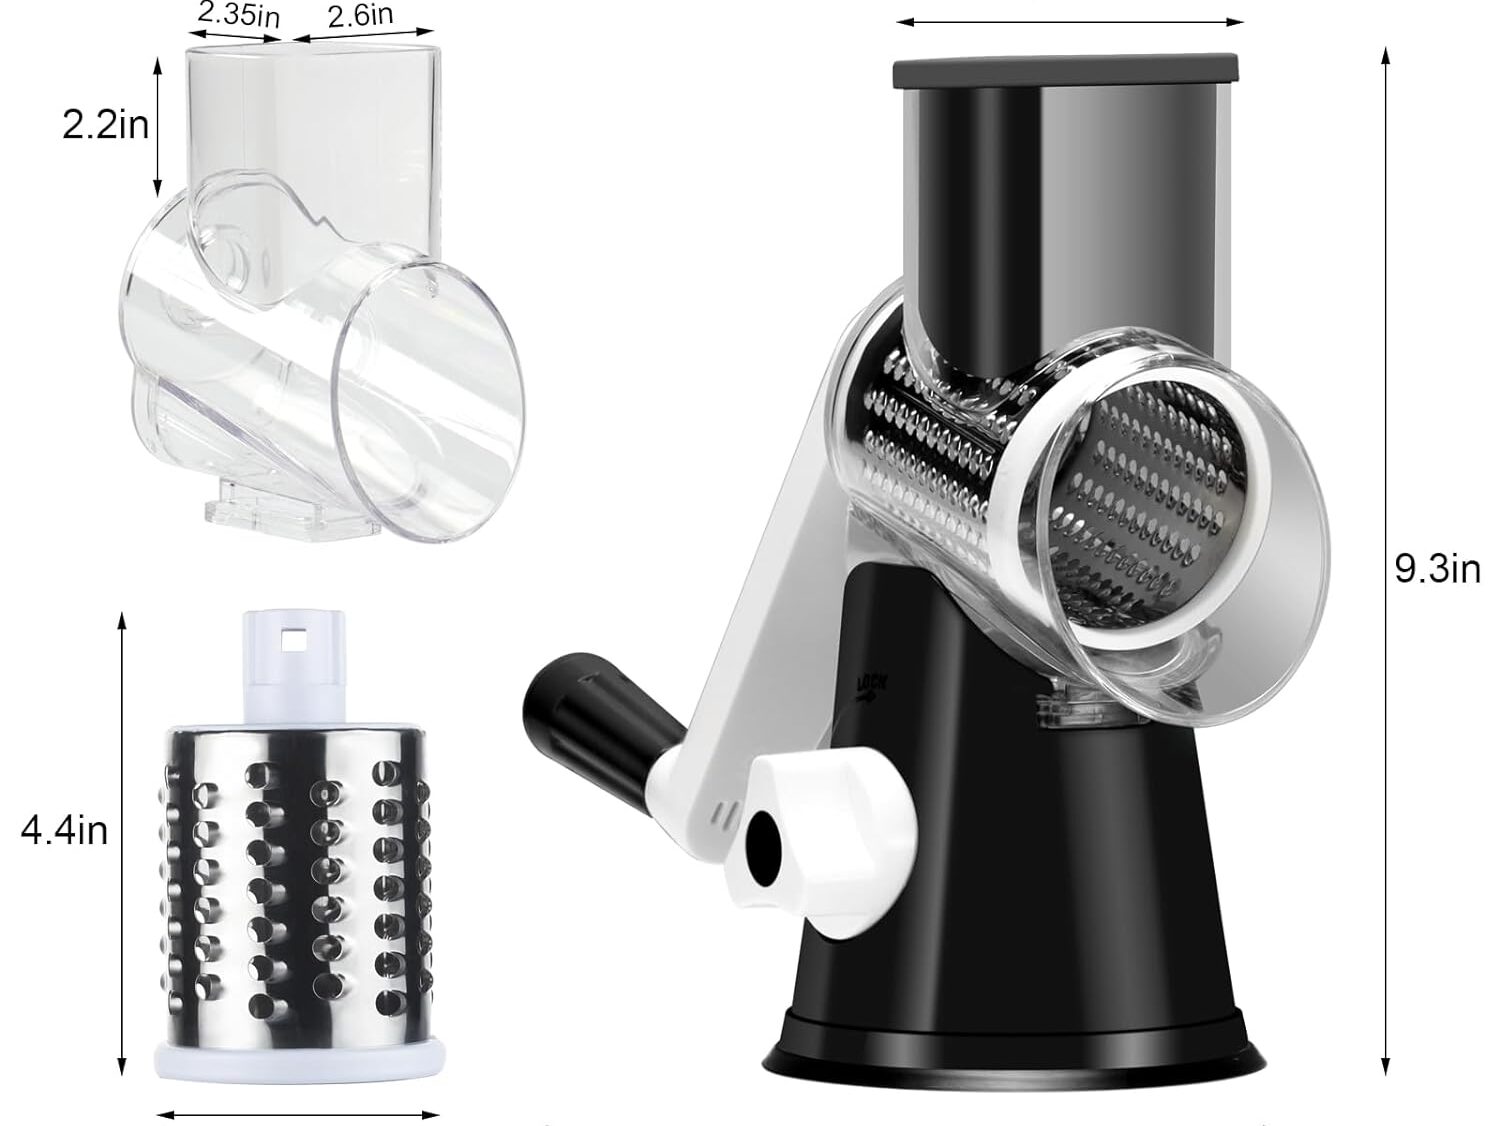
Components of the Cambom Rotary Cheese Grater
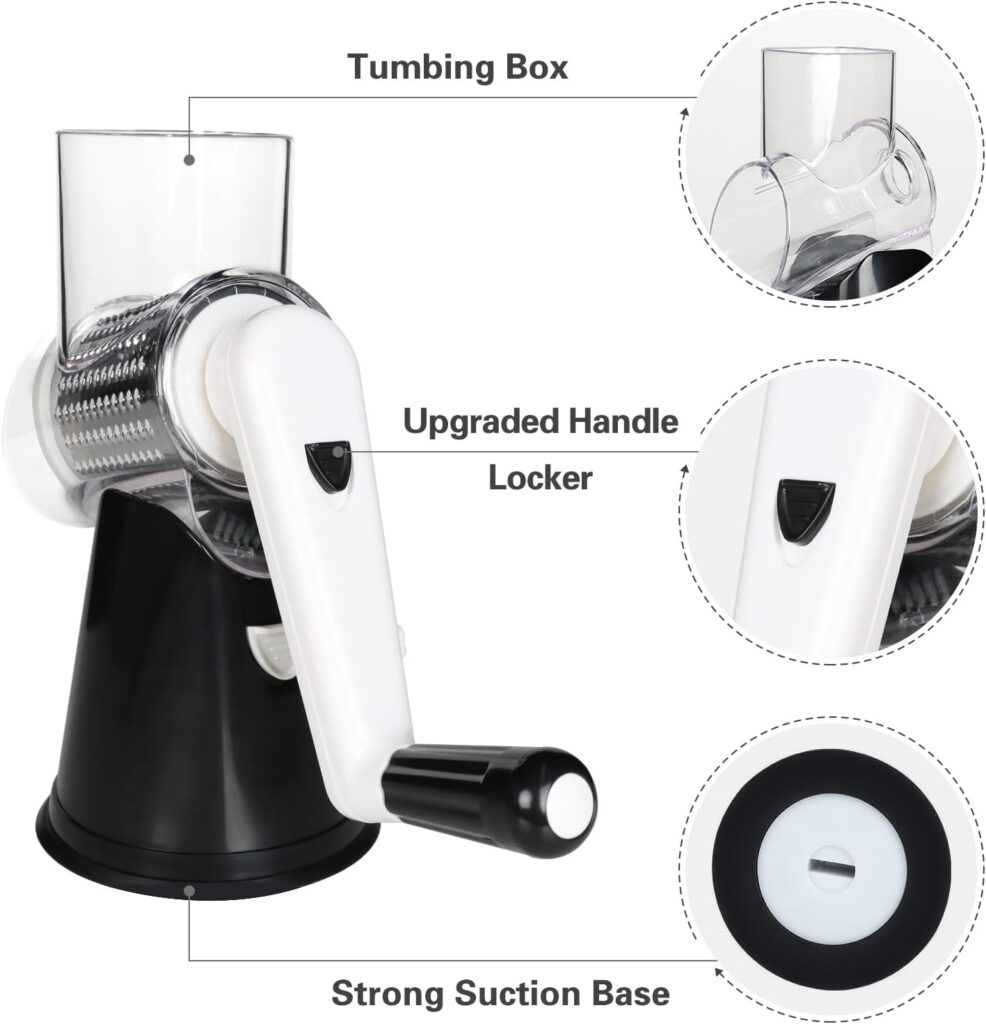
Before starting the assembly, familiarize yourself with the grater’s components:
- Base with Suction Cup: Provides stability during use.
- Transparent Barrel: Holds the food to be grated.
- Handle: Attaches to the barrel for manual operation.
- Food Pusher: Assists in guiding food into the grater.
- Interchangeable Blades: Typically includes coarse shredding, fine shredding, and slicing blades.
Step-by-Step Assembly Guide
Assembling your Cambom Rotary Cheese Grater correctly is essential for optimal performance and safety. Follow this detailed guide to ensure each component is properly connected:
1. Secure the Base
- Choose an Appropriate Surface: Place the grater’s base on a clean, flat, and non-porous surface such as a marble or glass countertop. The suction mechanism works best on smooth surfaces.
- Engage the Suction Cup: Press down firmly on the base to activate the suction cup. Some models may have a lever or locking mechanism; engage this to secure the base in place. A stable base prevents movement during use, enhancing safety and efficiency.
2. Attach the Transparent Barrel
- Align the Barrel: Identify the connection point on the base where the barrel attaches. Align the barrel’s opening with this point, ensuring any grooves or notches are properly matched.
- Insert and Secure: Gently push the barrel into the base until it clicks or fits snugly. Ensure it’s firmly attached to prevent wobbling during operation.
3. Insert the Blade
- Select the Appropriate Blade: Depending on your task, choose from the available blades—coarse shredding, fine shredding, or slicing.
- Position the Blade: Hold the blade by its edges to avoid contact with sharp surfaces. Insert it into the barrel, aligning it with the internal mechanism designed to hold it in place.
- Secure the Blade: Push the blade until it fits securely. Some models may require a slight twist to lock the blade. Ensure it’s stable to prevent dislodging during use.
4. Attach the Handle
- Align the Handle: Locate the protruding end of the blade outside the barrel. Align the handle’s opening with this end.
- Connect and Secure: Slide the handle onto the blade’s end and turn it clockwise (or as specified in the user manual) until it’s tightly secured. A firm connection ensures smooth operation when turning the handle.
5. Position the Food Pusher
- Prepare the Pusher: The food pusher is designed to guide food items safely into the grater.
- Place in the Barrel Opening: Insert the pusher into the top opening of the barrel. It’s used to press food items down towards the blade during grating, keeping your fingers safe from the sharp edges.
Final Checks
- Test Stability: Gently shake the assembled grater to ensure all parts are securely connected and the base remains firmly suctioned to the surface.
- Inspect for Proper Assembly: Verify that the handle turns the blade smoothly without resistance. If you encounter any issues, disassemble and reassemble the components, ensuring each step is correctly followed.
By meticulously following these assembly steps, you ensure that your Cambom Rotary Cheese Grater operates safely and efficiently, ready to assist you in various kitchen tasks.
Tips for Effective Use
- Stabilize the Grater: Ensure the suction base is firmly attached to prevent movement during use.
- Prepare Food Items: Cut larger items into smaller pieces that fit easily into the barrel.
- Use the Food Pusher: Always use the pusher to guide food into the grater, keeping fingers safe.
- Clean After Use: Disassemble the grater and wash all parts thoroughly to maintain hygiene and performance.
Frequently Asked Questions
Can I use the grater for soft cheeses?
Yes, but it’s recommended to chill soft cheeses before grating to achieve better results.
Is the grater dishwasher safe?
Most parts are dishwasher safe, but refer to the user manual for specific cleaning instructions.
How do I maintain the sharpness of the blades?
Regular cleaning and avoiding grating extremely hard substances will help maintain blade sharpness.
Proper assembly of the Cambom Rotary Cheese Grater is essential for safe and efficient operation. By following the steps outlined above, you can ensure that your grater is ready to handle various kitchen tasks with ease. Regular maintenance and correct usage will keep your grater in optimal condition, making food preparation a breeze.